Hadoop 2.7.2 MultiNode Cluster and Apache Flume on Ubuntu 16.04

Featured

This document describes how to install and configure Hadoop Cluster and Apache Flume. The below described project work is done towards our course- Cloud Computing Security and Privacy completion. We implemented IDS like application based on Hadoop MapReduce Framework,  To forward logs from applications servers to Hadoop we used Apache Flume. Our Hadoop Cluster consisted of one NameNode (Master) and two Data Nodes. We used Hadoop 2.7.2, Flume 1.6.0 and Ubuntu Server 16.04. Conceptual Diagram of our implementation is shown below.

Snap 2016-08-20 at 15.35.51

Data Flow to Hadoop

To forward real time live logs from application servers to Hadoop, we used Apache Flume. Below, we listed the data flow between different application servers and Hadoop.

  • Configured Rsyslog service on application servers (Web, FTP and Proxy Servers) to forward logs to Apache Flume for further processing.
  • Apache Flume was configured to listen on port 7000 for syslog events from Application servers.
  • Further, Apache Flume forwards the logs received from the application servers to a Flume directory in HDFS using memory as a channel, eventually logs are written to DataNodes.

The flow is described below in Figure

Snap 2016-08-20 at 13.58.59

Data Flow from Hadoop

Data flow from Hadoop to our IDS application is shown in figure below. we wrote script and scheduled to execute every five minutes to automates the complete process. I will cover this in part 2 of this tutorial

Snap 2016-08-20 at 14.01.20

Hadoop Installation

Update hosts file on all nodes with the following content

hadoop@HadoopMaster:~$ sudo vi /etc/hosts
127.0.0.1 localhost
#127.0.1.1 HadoopMaster
192.168.246.130 HadoopMaster
192.168.246.131 HadoopData1
192.168.246.132 HadoopData2
192.168.246.133 Flume

Install and verify Java on all nodes

hadoop@HadoopMaster:~$ sudo add-apt-repository ppa:webupd8team/java
hadoop@HadoopMaster:~$ sudo apt-get update
hadoop@HadoopMaster:~$ sudo apt-get install oracle-java8-installer
hadoop@HadoopMaster:~$ sudo apt-get install oracle-java8-set-default
hadoop@HadoopMaster:~$ java -version

Download Hadoop and Create HDFS NameNode Directory  on Master, HDFS DataNode Directory on HadoopData1 and HadoopData2 and tmp directory on all Nodes

hadoop@HadoopMaster:~$ cd /usr/local/
hadoop@HadoopMaster:/usr/local$ sudo wget http://apache.mirror.iweb.ca/hadoop/common/hadoop-2.7.2/hadoop-2.7.2.tar.gz
hadoop@HadoopMaster:/usr/local$ sudo mv hadoop-2.7.2/ hadoop/
hadoop@HadoopMaster:/usr/local$ sudo mkdir -p /usr/local/hadoop_tmp
hadoop@HadoopMaster:/usr/local$ sudo mkdir -p /usr/local/hadoop_store/hdfs/namenode
hadoop@HadoopMaster:/usr/local$ sudo mkdir -p /usr/local/hadoop_store/hdfs/datanode
hadoop@HadoopMaster:/usr/local$ sudo chown hadoop:hadoop hadoop* -R
hadoop@HadoopData1:/usr/local$ sudo mkdir -p /usr/local/hadoop_store/hdfs/datanode
hadoop@HadoopData1:/usr/local$ sudo chown hadoop:hadoop hadoop* -R
hadoop@HadoopData2:/usr/local$ sudo mkdir -p /usr/local/hadoop_store/hdfs/datanode
hadoop@HadoopData2:/usr/local$ sudo chown hadoop:hadoop hadoop* -R

Create ssh keys and transfer it to data nodes so that nodes can access each other without passphrase

hadoop@HadoopMaster:~$ ssh-keygen -t rsa -P ""
hadoop@HadoopMaster:~$ ssh-copy-id -i .ssh/id_rsa localhost
hadoop@HadoopMaster:~$ ssh-copy-id -i ~/.ssh/id_rsa.pub hadoop@HadoopData1
hadoop@HadoopMaster:~$ ssh-copy-id -i ~/.ssh/id_rsa.pub hadoop@HadoopData2

Set Hadoop and Java Environment Variables, append following at the end of  ~/.bachrc file on each node

export JAVA_HOME=/usr/lib/jvm/java-8-oracle
export PATH=$JAVA_HOME/bin:$PATH
export HADOOP_INSTALL=/usr/local/hadoop
export PATH=$PATH:$HADOOP_INSTALL/bin
export PATH=$PATH:$HADOOP_INSTALL/sbin
export HADOOP_MAPRED_HOME=$HADOOP_INSTALL
export HADOOP_COMMON_HOME=$HADOOP_INSTALL
export HADOOP_HDFS_HOME=$HADOOP_INSTALL
export YARN_HOME=$HADOOP_INSTALL
export HADOOP_COMMON_LIB_NATIVE_DIR=$HADOOP_INSTALL/lib/native
export HADOOP_OPTS="-Djava.library.path=$HADOOP_INSTALL/lib"
export HADOOP_CLASSPATH=${JAVA_HOME}/lib/tools.jar

Reload bashrc file with following command

hadoop@HadoopMaster:~$ source ~/.bashrc

Hadoop Configuration

Goto Hadoop directory

hadoop@HadoopMaster:~$ cd /usr/local/hadoop/etc/hadoop/

update Java Path in file hadoop-env.sh

export JAVA_HOME=/usr/lib/jvm/java-8-oracle

Update the content of core, hdfs, mapred and yarn files

core-site.xml

<configuration>
<property>
 <name>hadoop.tmp.dir</name>
 <value>/usr/local/hadoop_tmp/tmp</value>
</property>
<property>
 <name>fs.default.name</name>
 <value>hdfs://HadoopMaster:54310</value>
</property>
</configuration>

hdfs-site.xml

<configuration>
<property>
 <name>dfs.replication</name>
 <value>2</value>
</property>
<property>
 <name>dfs.namenode.name.dir</name>
 <value>file:/usr/local/hadoop_store/hdfs/namenode</value>
 </property>
<property>
 <name>dfs.datanode.data.dir</name>
 <value>file:/usr/local/hadoop_store/hdfs/datanode</value>
</property>
<property>
 <name>dfs.permissions</name>
 <value>false</value>
</property>
</configuration>

mapred-site.xml

<configuration>
<property>
 <name>mapreduce.framework.name</name>
 <value>yarn</value>
</property>
</configuration>

yarn-site.xml

<configuration>
<property>
 <name>yarn.nodemanager.aux-services</name>
 <value>mapreduce_shuffle</value>
</property>
<property>
 <name>yarn.nodemanager.aux-services.mapreduce.shuffle.class</name>
 <value>org.apache.hadoop.mapred.ShuffleHandler</value>
</property>
<property>
 <name>yarn.resourcemanager.resource-tracker.address</name>
 <value>HadoopMaster:8025</value>
</property>
<property>
 <name>yarn.resourcemanager.scheduler.address</name>
 <value>HadoopMaster:8030</value>
</property>
<property>
 <name>yarn.resourcemanager.address</name>
 <value>HadoopMaster:8050</value>
</property>
</configuration>

Update masters file with the hostname of Master node

hadoop@HadoopMaster:/usr/local/hadoop/etc/hadoop$ vi masters
HadoopMaster

Update   slaves file with the hostnames of DataNodes/Slaves

hadoop@HadoopMaster:/usr/local/hadoop/etc/hadoop$ vi slaves
HadoopData1 
HadoopData2

sync configuration on both data nodes

hadoop@HadoopMaster:~$ rsync -avP /usr/local/hadoop/etc/hadoop/ hadoop@HadoopData1:/usr/local/hadoop/etc/hadoop/
hadoop@HadoopMaster:~$ rsync -avP /usr/local/hadoop/etc/hadoop/ hadoop@HadoopData2:/usr/local/hadoop/etc/hadoop/

format namenode

hadoop@HadoopMaster:~$ hadoop namemode -format

start hadoop cluster

start-all.sh

following figure shows processes running on HadoopMaster

Snap 2016-08-19 at 21.17.28

following figure shows processes running on Hadoop DataNodes

Snap 2016-08-19 at 21.29.18

create Flume input directory on Hadoop

hadoop@HadoopMaster:~$ hadoop fs -mkdir /user 
hadoop@HadoopMaster:~$ hadoop fs -mkdir /user/hadoop 
hadoop@HadoopMaster:~$ hadoop fs -mkdir /user/hadoop/flume 
hadoop@HadoopMaster:~$ hadoop fs -mkdir /user/hadoop/flume/input

Apache Flume Installation and Configuration

I installed Flume using Cloudera’s packages, data flow from Application Servers to Hadoop is shown in following figure

Snap 2016-08-20 at 13.58.59

to install flume issue following commands

flume@flume:~$ sudo wget https://archive.cloudera.com/cdh5/ubuntu/trusty/amd64/cdh/archive.key -O archive.key
flume@flume:~$ sudo apt-key add archive.key
flume@flume:~$ sudo wget 'https://archive.cloudera.com/cdh5/ubuntu/trusty/amd64/cdh/cloudera.list' -O /etc/apt/sources.list.d/cloudera.list
flume@flume:~$ sudo apt-get update
flume@flume:~$ sudo apt-get install flume-ng
flume@flume:~$ cd /etc/flume-ng/conf
flume@flume:/etc/flume-ng/conf$ sudo cp flume-env.sh.template flume-env.sh

edit flume-env.sh and update JAVA path, to verfiy java path run command “update-alternatives –config java”

export JAVA_HOME=/usr/lib/jvm/java-8-openjdk-amd64/jre/bin

create file flume-syslog.conf and paste the following content in it

flume@flume:~$ sudo vi /etc/flume-ng/conf/flume-syslog.conf
# Flume-syslog agent
a1.sources = r1
a1.sinks = k1
a1.channels = c1

# Source - SyslogUDP
a1.sources.r1.type = syslogudp
a1.sources.r1.command = 0.0.0.0
a1.sources.r1.port = 7777
a1.sources.r1.keepFields = timestamp,hostname

# Sink - HDFS
a1.sinks.k1.type = hdfs
a1.sinks.k1.hdfs.path = hdfs://HadoopMaster:54310/user/hadoop/flume/input
a1.sinks.k1.hdfs.fileType = DataStream
a1.sinks.k1.hdfs.writeFormat = Text
a1.sinks.k1.hdfs.batchSize = 10000
a1.sinks.k1.hdfs.rollSize = 0
a1.sinks.k1.hdfs.rollInternal = 600
a1.sinks.k1.hdfs.rollCount = 10000
a1.sinks.k1.hdfs.filePrefix = syslog
a1.sinks.k1.hdfs.minBlockReplicas = 1

# Memory Channel
a1.channels.c1.type = memory
a1.channels.c1.capacity = 1000
a1.channels.c1.transactionCapacity = 100

# Binding Source and Sink to Channel
a1.sources.r1.channels = c1
a1.sinks.k1.channel = c1

To start Flume on boot, create flume-ng.service file and paste following content in it

flume@flume:~$ sudo vi /etc/systemd/system/flume-ng.service
[Unit]
Description=Apache Flume

[Service]
ExecStart=/usr/bin/nohup /usr/bin/flume-ng agent -c conf -f /etc/flume-ng/conf/flume-syslog.conf --name a1 &

[Install]
WantedBy=multi-user.target

set permissions and enable flume-ng service to start on boot by issuing following commands

flume@flume:~$ chmod 664 /etc/systemd/system/flume-ng.service
flume@flume:~$ systemctl daemon-reload
flume@flume:~$ systemctl enable flume-ng.service

reboot and verify that flume is working by issuing command “ps -aux | grep flume-ng”, if everything goes well you will see similar output as shown in following picture

Snap 2016-08-18 at 23.57.29

Forwarding Syslog to Flume:

on client machines add following line in the end of rsyslog file

flume@flume:~$ sudo vi /etc/rsyslog.conf
*.* @Flume:7777

save and restart rsyslog service

hadoop@HadoopData2:~$ sudo service rsyslog restart

‘hadoop fs -ls /user/hadoop/flume/input’ will show all files created by Flume

Snap 2016-08-19 at 00.01.27

Asterisk Speed Dial Integration with Active Directory

Featured

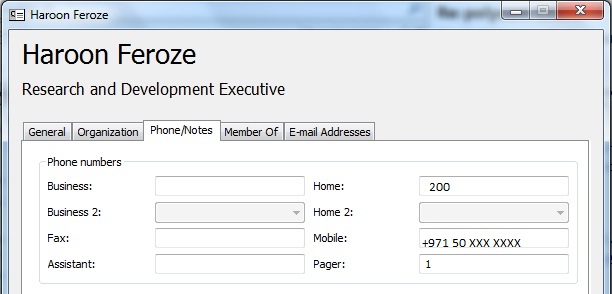
You urgently wanted to discuss important matter with your colleague, from your desk phone you dialed his number, but unfortunately he was not on his seat, now you will search his phone number to reach him on his mobile, instead why not just simply dial single digit code followed by user’s actual extension number to reach him, for instance, user’s extension is 200 and speed dial code is 6, so by dialing 6200 everyone will be able to reach him on mobile, provided that his mobile number has been entered in the DB.

It’s fairly simple to setup speed dial with asterisk using astdb, however if you have multiple branches, then it will become a tiresome job to update all DBs if there is any change.

Solution?

Centralized database where all employee information is stored so that it will be easy for administrator’s to change in the database. We have populated AD at our office, Employee Extension is stored in “ipPhone” and mobile contains mobile number of the employee. When speed dial number is dialed, script sends query to AD, to give mobile number against extension number.

for instance, my extension number is 200 and if anyone wants to reach me on my mobile, one just need to dial speed dial prefix with my extension number, 6200 in my case, upon dialing, script will look for corresponding number against extension number 200, once found Asterisk will call out that number.

SpeedDial

Add following in extensions_custom.conf file

[app-speeddial-custom]
exten => _6.,1,Macro(user-callerid,)
exten => _6.,n,AGI(speeddial)

to download speedial.php ClickHere
copy it to /var/lib/asterisk/agi-bin folder
set owner and permissions:
chown asterisk:asterisk /var/lib/asterisk/agi-bin/speeddial.php
chmod 755 /var/lib/asterisk/agi-bin/speeddial.php

set ldap dn and authentication parameters according to your environment
$ldap_url = ‘ad.mydomain.com’;
$ldap_domain = ‘mydomain.com’;
$ldap_dn = “dc=mydomain,dc=com”;
$username = “username”;
$password = “password”;

If you want to use filter other than “ipPhone” change it
$filter = “(&(objectCategory=person)(ipPhone=$ID))”;

Voicemail’s Password Retrieval

Featured

If you are using VMAuthenticate() to authenticate a user you might be frequently getting request from users to reset their voicemail’s password. To avoid such requests i wrote script which automatically sends password to the email address assigned to their extension number. It is fairly simple but it helps us quite a lot in reducing number of calls and users don’t have to wait for IT personnel to reset their password.

Procedure:

User has to dial one extension number, he will hear “your voicemail’s password will be emailed to you shortly”.
Caller’s CallerIDNum will be passed as an argument to script, which looks for extension’s name, password and email address in voicemail.conf file and once found sends email to user containing his extension’s password along with details for how to change it.

Add following in extensions_custom.conf

exten => 800,1,Wait(2)
exten => 800,n,System(/var/lib/asterisk/agi-bin/voicemail.php “${CALLERID(num)}”)
exten => 800,n,Playback(voicemailpassword)
exten => 800,n,Hangup()

touch /var/log/asterisk/voicemail.txt
copy downloaded file to /var/lib/asterisk-agi-bin/
set permissions chmod 777 voicemail.php
and on asterisk’s console run “dialplan reload”

To download code Click Here

#!/usr/bin/php
<?php

$CallerIdNum = $argv[1];
$CallerEmail=””;
$VmFile = file(“/etc/asterisk/voicemail.conf”);

foreach($VmFile as $line)
{
if(substr_compare($line,$CallerIdNum.” =>”,0,6) === 0) {

$pieces = explode(“,”, $line);
$CallerEmail = $pieces[2];
$Password = $pieces[0];
$CallerName = $pieces[1];
}
}
if(strlen($CallerEmail) != 0 ) {
log_write($CallerEmail . ” ” . $CallerIdNum);
$pos = strpos($Password, ‘=>’);
$passwd = substr($Password, $pos +3);
email($CallerEmail,$passwd,$CallerName);
exit();
}

log_write(“No Record Found ” . $CallerIdNum . ” “);
exit();

function log_write($text) {
$text = $text . ” ” . date(‘D jS \of F Y’) . ” ” . date(‘h:i:s A’) . ” “;
$logFile = “/var/log/asterisk/voicemail.txt”;
$fh = fopen($logFile, ‘a’) or die(“can’t open file”);
fwrite($fh, $text.”\n”);
fclose($fh);
}

function email($email,$password,$name) {
$Subject = “Voicemail’s Password”;
$Body = “Dear ” . $name . “,\n\n”;
$Body = $Body . “Your Voicemail’s Password is” . ” ” . $password . “. \n\n”;
$Body = $Body . “To Change Your Password: \n\t Dial (7 + Your Extension Number)”;
$Body = $Body . “\n\t Type In Your Password \n\t Press 0 \n\t Press 5”;
$Body = $Body . “\n\t Type In Your New Password (you will be prompted to repeat this step)”;

mail($email, $Subject, $Body);
}

?>

Step by Step Installation and Configuration of OpenLDAP as Proxy to Active Directory

Featured

This guide describes how to install and configure OpenLDAP as proxy to Active Directory.

Installation:
yum install openldap-servers openldap-clients

Sample Files:
cp /usr/share/openldap-servers/DB_CONFIG.example /var/lib/ldap/DB_CONFIG
cp /usr/share/openldap-servers/slapd.conf.obsolete /etc/openldap/slapd.conf

Set BASE and URI:
vi /etc/openldap/ldap.conf
BASE dc=mydomain,dc=com
URI ldap://localhost

Create Structure:
vi /root/mydomain.ldif
dn: dc=mydomain,dc=com
dc: mydomain
objectClass: dcObject
objectClass: organizationalUnit
ou: mydomain.com

dn: cn=openldap,dc=mydomain,dc=com
objectClass: top
objectClass: person
cn: openldap
sn: openldap
userPassword: 1111

Create Root User Password:

edit /etc/openldap/slapd.conf
change dc=”my-domain” to mydomain or your domain name
and update rootpw with the password you created in previous step

remove everything in slap.d directory and add ldif file you created
rm -rf /etc/openldap/slapd.d/*
slapadd -v -l /root/mydomain.ldif

[root@haroon openldap]# slapadd -v -l mydomain.ldif
The first database does not allow slapadd; using the first available one (2)
added: “dc=mydomain,dc=com” (00000001)
added: “cn=openldap,dc=mydomain,dc=com” (00000002)
_#################### 100.00% eta none elapsed none fast!
Closing DB…

Test:
slaptest -f /etc/openldap/slapd.conf -F /etc/openldap/slapd.d/

Set Appropriate Permissions:
chown -R ldap:ldap /etc/openldap/slapd.d/
chown -R ldap:ldap /var/lib/ldap

Enable Logging
add following line in /etc/rsyslog.conf file.
local4.* /var/log/ldap.log

Start LDAP service:
service slapd start

Test:
ldapsearch -x -H ldap://localhost

Configuring as Proxy to AD:
vi /etc/openldap/slapd.conf
add following under “database definitions”

database ldap
suffix “OU=dept,DC=domain,DC=co,DC=ae”
uri ldap://ad.domain.co.ae/
rebind-as-user
idassert-bind bindmethod=simple
binddn=”CN=open,OU=dept,DC=domain,DC=co,DC=ae”
credentials=open
mode=none
idassert-authzFrom “*”

rm -rf /etc/openldap/slapd.d/*
slaptest -f /etc/openldap/slapd.conf -F /etc/openldap/slapd.d
chown -R ldap:ldap /etc/openldap/slapd.d
service slapd restart

Test:
ldapsearch -H ldap://localhost -x -b “ou=dept,dc=domain,dc=co,dc=ae” -LLL “(cn=haroon*)”

Linux DHCP configuration for Polycom Phones

subnet 192.168.1.0 netmask 255.255.255.0 {

option routers 192.168.1.1;
option subnet-mask 255.255.255.0;

option nis-domain “domain.com”;
option domain-name “domain.com”;
option domain-name-servers 192.168.1.2;

option time-offset 14400;
option ntp-servers 192.168.1.2;

default-lease-time 21600;
max-lease-time 43200;

class “polycom” {
match if substring (hardware,1,3) = 00:04:f2;
option tftp-server-name “tftp://192.168.1.2”;
}
pool {
range 192.168.1.100 192.168.1.180;
allow members of “polycom” ;
}
}

Configuring Quintum Gateway with Switchvox

Configuring Quintum with Asterisk is fairly simple and already been explained at number of sites. However in order to configure Quintum with Switchvox you need to perform few more steps. First add SIP provider on Switchvox. Under peer settings of SIP Provider you will find two host types: ‘Provider’ and ‘Peer’, provider means Switchvox will register on it and peer is another PBX, you need to select “Peer” as host type. By default Quintum registers on the SIP PBX to send calls, but once you set host ‘type = Peer’ Switchvox will not accept registration for that peer, to disable registration all you need to do is to set “Register Expiry Time = 0” in Quintum , as shown below:

QuintumSwitchvoxSIP

If you test it at this point, you will not be able to reach “Call Back Extension” you have configured for this trunk

You need to enter value of “Call Back Extension” for this peer in DNIS, which you can find under “IP Extensions” in Quintum.

QuintumSwitchvoxDNIS

RHCE Exam Prep Guide

In the month of Oct, 2012 I passed my RHCE exam, i used Micheal Jang’s book for studying, following is the guide which I prepared to practice.

RHCE Exam objectives can be found from following link:

http://www.redhat.com/training/courses/ex300/examobjective

In exam first you will have to create yum repository, don’t forget to disable rhn and import gpg key prior to testing your newly created yum repository.

Yum
SeLinux
TCP Wrappers
SSH Key Based Authentication
Create RPM Package
Email System
Web Server
Samba Server
NFS File Server
FTP Server
DNS
System Logging Server

YUM
mkdir /var/www/html/RHEL6
cp -ar /media/RHEL-DVD/* /var/www/html/RHEL6

vi /etc/yum/plugins.d/rhnplugin.conf
enabled = 0

vi /etc/yum.repos.d/test.repo
[test]
name=test
baseurl=http://url
enabled=1

[root@domain ~]# rpm –import /etc/pki/rpm-gpg/RPM-GPG-KEY-redhat-release

#yum clean all
#yum update
#yum list

IP Forwarding:
#vi /etc/sysctl
net.ipv4.ip_forward=1
#sysctl -p
#cat /proc/sys/net/ipv4/ip_forward

Disable Ping Reply Permanently
vi /etc/sysctl.conf
net.ipv4.icmp_echo_ignore_all = 1
#sysctl -p

Disable Ping Reply Temporarily
echo “1” “>” /proc/sys/net/ipv4/icmp_echo_ignore_all

top

SeLinux:

Status:
#getenforce
Output : Enforcing/Permissive
#sestatus
SELinux status: enabled
SELinuxfs mount: /selinux
Current mode: enforcing
Mode from config file: enforcing
Policy version: 23
Policy from config file: targeted

Enabling/Disabling SeLinux:
/etc/selinux/config (for permanently)
#setenforce “1” (enforcing)
#setenforce “0” (permissive)

SeLinux Boolean:

#getsebool boolean
e.g #getsebool ftp_home_dir
Output : ftp_home_dir –> off

To Set Boolean:
#setsebool ftp_home_dir 1
or #togglesebool ftp_home_dir
to make change permanently
#setsebool -P ftp_home_dir 1

Brief Discription of Booleans with their status run :
#semanage boolean -l command
first package ‘policycoreutils-python’ should be installed before using ‘semanage’

Contexts:
#chcon -R –reference=/var/www/html /www/html
#semanage fcontext -a -s system_u -t httpd_sys_conten_t /www/*
#restorecon -R /ftp
#semanage fcontext -d /ftp (delete)
#ls -Zd /ftp

top

TCP Wrappers
#ldd /path/to/daemon | grep libwrap.so
#whereis sshd
Output : sshd: /usr/sbin/sshd /usr/share/man/man8/sshd.8.gz
#ldd /usr/sbin/sshd | grep libwrap.so
output : libwrap.so.0 => /lib/libwrap.so.0 (0*001be000)

/etc/hosts.allow
/etc/hosts.deny

/etc/hosts.allow
vsftpd : localhost 127. 192.168.1.10
vsftpd : 192.168.2. EXCEPT 192.168.2.10

/etc/hosts.deny
sshd : 192.168.5.
ALL : ALL

top

SSH Key Based Authentication

#ssh-keygen (RSA Key by default)
#ssh-keygen -b 8192 (8192 bits)
#ssh-keygen -t dsa (DSA instead of RSA)

View Keys:
[haroon@domain ~]$ ls -l .ssh

[haroon@domain ~]$ ssh-keygen
Generating public/private rsa key pair.
Enter file in which to save the key (/home/haroon/.ssh/id_rsa):
Created directory ‘/home/haroon/.ssh’.
Enter passphrase (empty for no passphrase):
Enter same passphrase again:
Your identification has been saved in /home/haroon/.ssh/id_rsa.
Your public key has been saved in /home/haroon/.ssh/id_rsa.pub.
The key fingerprint is:
26:4b:72:36:1d:aa:9f:e3:96:76:34:df:df:7b:c6:a6 haroon@domain.example.com
The key’s randomart image is:
+–[ RSA 2048]—-+
| |
| |
| . |
| o . |
| . B S |
| * =o |
| . .o o . . |
| .=.. . . .=|
| ++o .E=+|
+—————–+

Transmit Public Key to Remote System:

[haroon@domain ~]$ ssh-copy-id -i .ssh/id_rsa.pub haroon@192.168.1.10
The authenticity of host ‘192.168.1.10 (192.168.1.10)’ can’t be established.
RSA key fingerprint is 32:02:bf:74:79:dc:2e:69:98:60:06:b5:49:41:42:d4.
Are you sure you want to continue connecting (yes/no)? yes
Warning: Permanently added ‘192.168.1.10’ (RSA) to the list of known hosts.
haroon@192.168.1.10’s password:
Now try logging into the machine, with “ssh ‘haroon@192.168.1.10′”, and check in:

.ssh/authorized_keys

to make sure we haven’t added extra keys that you weren’t expecting.

Login:

[haroon@domain ~]$ ssh -l haroon 192.168.1.10
Last login: Tue Oct 16 06:24:01 2012 from 192.168.1.20
[haroon@station ~]$

or

[haroon@domain ~]$ ssh haroon@192.168.1.10
Last login: Sat Nov 3 05:07:19 2012 from 192.168.1.80
[haroon@station ~]$

User Based Security for SSH:

sshd : /etc/ssh/sshd_config
AllowUsers
AllowGroups
DenyUsers
DenyGroups

Host Based Security for SSH:

/etc/hosts.allow
sshd : 192.168.2. EXCEPT 192.168.2.10

/etc/hosts.deny
sshd : 192.168.5.
ALL : ALL

top

Create RPM Package

#yum install rpm-build rpmdevtools
#rpmbuild-setuptree
#rpmdev-setuptree
#rpmdev-newspec
#mkdir testpack-1.0
#mv install.log testpack-1.0/install.pdf
#tar czvf testpack-1.0.tar.gz testpack-1.0/
#mv testpack-1.0.tar.gz rpmbuild/SOURCES/
#mv newpackage.spec rpmbuild/SPECS/testpack.spec

Edit rpmbuild/SPECS/testpack.spec and remove followings
BuildRequires:
Requires:
%configure
make %{?_smp_mflags}
make install DESTDIR=$RPM_BUILD_ROOT

Following needs to be added in the default SPEC file.
install -d -m 0755 $RPM_BUILD_ROOT/opt/testpacl-1.0
install -m 0644 install.pdf $RPM_BUILD_ROOT/opt/testpacl-1.0/install.pdf

%dir /opt/testpack-1.0
/opt/testpack-1.0/install.pdf

Final SPEC File:
Name: testpack
Version: 1.0
Release: 1%{?dist}
Summary: Test Package
Group: Miscellaneous
License: GPL
URL: http://www.gpl.org
Source0: testpack-1.0.tar.gz
BuildRoot: %{_tmppath}/%{name}-%{version}-%{release}-root-%(%{__id_u} -n)

%description
This is a package with one file.

%prep
%setup -q
%build
%install
rm -rf $RPM_BUILD_ROOT

install -d -m 0755 $RPM_BUILD_ROOT/opt/testpack-1.0
install -m 0644 install.pdf $RPM_BUILD_ROOT/opt/testpack-1.0/install.pdf

%clean
rm -rf $RPM_BUILD_ROOT

%files
%dir /opt/testpack-1.0
%defattr(-,root,root,-)
/opt/testpack-1.0/install.pdf
%doc

%changelog

Build RPM Package:

#rpmbuild -ba rpmbuild/testpack.spec
built RPM /root/rpmbuild/RPMS/x86_64/testpack-1.0-1.el6.x86_64.rpm

top

Email System

“alternatives” to select an Email system
#alternatives –config mta

run “newaliases” command after making changes in /etc/aliases file

run “postmap filename” to process into a binary
e.g. postmap access

vi /etc/postfix/main.cf
and set or change values of following

myhostname = domain.example.com
mydomain = example.com
myorigin = $mydomain
inet_interfaces = all
mydestination = $myhostname, localhost.$mydomain, localhost, $mydomain
mynetworks = 192.168.1.0/24, 127.0.0.0/8

once changes are being made, to review configuration run “postconf” command
check for errors run “postfix check”

for PostFix Authentication,
/usr/share/doc/postfix-2.6.6/README-Postfix-SASL-RedHat.txt

1) Edit /etc/postfix/main.cf and set this:
smtpd_sasl_auth_enable = yes
smtpd_sasl_security_options = noanonymous
broken_sasl_auth_clients = yes
smtpd_recipient_restrictions = permit_sasl_authenticated,permit_mynetworks,reject_unauth_destination

2) Turn on saslauthd:
/sbin/chkconfig –level 345 saslauthd on
/sbin/service saslauthd start

3) Edit /etc/sysconfig/saslauthd and set this:
MECH=pam

4) Restart Postfix:
/sbin/service postfix restart

Configure a Relay Through a Smart Host:
vi /etc/postfix/main.cf
relayhost = smtp.domain.com

top

Web Server

yum groupinstall “Web Server”
yum install httpd-manual

Virtual Host: /etc/httpd/conf/httpd.conf
uncomment
NameVirtualHost *:80

ServerAdmin admin@domain.example.com
DocumentRoot /www/docs/web.domain.example.com
ServerName web.domain.example.com
ErrorLog logs/web.domain.example.com-error_log
CustomLog logs/web.domain.example.com-access_log common

Secure WebSite: /etc/httpd/conf.d/ssl.conf
cp /etc/httpd/conf.d/ssl.conf /root
add “NameVirtualHost *:443”
Add ServeAdmin admin@domain.example.com
and uncomment DocumentRoot and ServerName

Create Certificate
#cd /etc/pki/tls/certs
genkey domain.example.com

HTTP Authentication:

AuthType Basic
AuthName “Password Protected Test”
AuthUserFile /etc/httpd/testpass
Require user engineer1 engineer2

htpasswd -c /etc/httpd/testpass engineer1 (-c create file)
htpasswd /etc/httpd/testpass engineer2

Apache Home Directory Access:
comment out UserDir disabled
uncomment UderDir public_html

users can access webpages from their home directory
/home/haroon/public_html

but we need to change
chmod 701 /home/haroon
chmod 701 /home/haroon/public_html

if ACLs are enabled
setfacl -m u:apache:x /home/haroon
setfacl -m u:apache:x /home/haroon/public_html

Selinux must be enabled to allow httpd home directories by
setsebool -P httpd_enable_homedirs 1

enable stanza in /etc/httpd/conf/httpd.conf directory

http://ip/~haroon

top

Samba Server
#yum groupinstall “CIFS file server”

top

NFS File Server
#yum groupinstall “NFS file server”

vi /etc/exports
/NFS 192.168.1.0/24(rw)

#mkdir /NFS
#touch test1 test2

showmount -e localhost

vi /etc/sysconfig/nfs
uncomment followings
RQUOTAD_PORT=875
LOCKD_TCPPORT=32803
LOCKD_UDPPORT=32769
MOUNTD_PORT=892
STATD_PORT=662

add following firewall rules
-A INPUT -p udp -m state –state NEW -m udp –dport 111 -j ACCEPT
-A INPUT -p tcp -m state –state NEW -m tcp –dport 111 -j ACCEPT
-A INPUT -p udp -m state –state NEW -m udp –dport 662 -j ACCEPT
-A INPUT -p tcp -m state –state NEW -m tcp –dport 662 -j ACCEPT
-A INPUT -p udp -m state –state NEW -m udp –dport 875 -j ACCEPT
-A INPUT -p tcp -m state –state NEW -m tcp –dport 875 -j ACCEPT
-A INPUT -p udp -m state –state NEW -m udp –dport 892 -j ACCEPT
-A INPUT -p tcp -m state –state NEW -m tcp –dport 892 -j ACCEPT
-A INPUT -p udp -m state –state NEW -m udp –dport 2049 -j ACCEPT
-A INPUT -p tcp -m state –state NEW -m tcp –dport 2049 -j ACCEPT
-A INPUT -p udp -m state –state NEW -m udp –dport 32769 -j ACCEPT
-A INPUT -p tcp -m state –state NEW -m tcp –dport 32803 -j ACCEPT

chkconfig nfs on
service nfs start

[root@domain NFS]# showmount -e localhost
Export list for localhost:
/NFS 192.168.1.0/24

[root@station ~]# showmount -e 192.168.1.80
Export list for 192.168.1.80:
/NFS 192.168.1.0/24

Mount NFS Share:
mount.nfs4 192.168.1.80:/NFS /NFS

fstab entry:
192.168.1.80:/NFS /NFS nfs4 soft,timeo=100 0 0

top

FTP Server
yum install vsftpd

ftp user : vi /etc/passwd
ftp:x:14:50:FTP User:/var/ftp:/sbin/nologin

Anonymous Download Only:
vi /etc/vsftpd/vsftpd.conf
comment
local_enable=YES

User Based Security:
vsFTPs uses PAM for security, all users listed in /etc/vsftpd/ftpusers will be denied access as describer in pam.d/vsftpd file
/etc/pam.d/vsftpd
auth required pam_listfile.so item=user sense=deny file=/etc/vsftpd/ftpusers onerr=succeed

Host based security can be implemented using TCP Wrappers.

top

DNS
#yum install bind
allow-query { localhost; 192.168.1.0/24; };

A Caching Only Name Server:
vi /etc/named.conf
change listen-on port 53 { 127.0.0.1; };

to listen-on port 53 { 127.0.0.1; 192.168.1.80; };

A Forwarding Only Name Server:
listen-on port 53 { 127.0.0.1; 192.168.1.80; };
Add
forward only;
forwarders { 192.168.1.1; };

Forwarding from a Caching Only Name Server:
listen-on port 53 { 127.0.0.1; 192.168.1.80; };
forwarders { 192.168.1.1; };

dig @127.0.0.1 http://www.google.com

top

System Logging Server

Configure Logging Server:
uncomment
# Provides UDP syslog reception
#$ModLoad imudp
#$UDPServerRun 514
or
# Provides TCP syslog reception
#$ModLoad imtcp
#$InputTCPServerRun 514

Configure Logging Client:
for UDP
*.* @192.168.1.80:514
for TCP
*.* @@192.168.1.80:514

top